
Why this platform?
When selecting a platform for my blog, I had several requirements in mind:
- It needed to be quick and easy to set up, as well as free to host and deploy, so that I could focus on creating content rather than configuration.
- I wanted the ability to write posts in plaintext or a similar format, with the flexibility to easily transfer content to a new platform in the future.
- As my content would not require dynamic interaction, I preferred a static website format.
- While I have experience with
HTML,CSS, andJavaScript, I did not want to reinvent the wheel, so a website template was necessary.
After careful consideration, I selected the following options:
- Source Template: Chirpy
- Host: GitHub Pages
- Visuals: Stable Diffusion 1.5
During my search, I found several excellent templates, including HTML5 UP, karanpra3apsingh.com, and jcoelho93.netlify.com. However, Chirpy was the best fit for my needs.
GitHub Pages provided the ideal hosting solution, offering a free service for every account and effortless deployment when using a Jekyll template.
Creating a unique photo with a custom trained Stable Diffusion model was the most time-consuming aspect of the process. I plan to share the details of how I used SD to generate the image in a separate post.
Setup Guide
While Chirpy is meant to be pain-free I did have some stumbling blocks, so let’s go through the steps I used to set everything up.
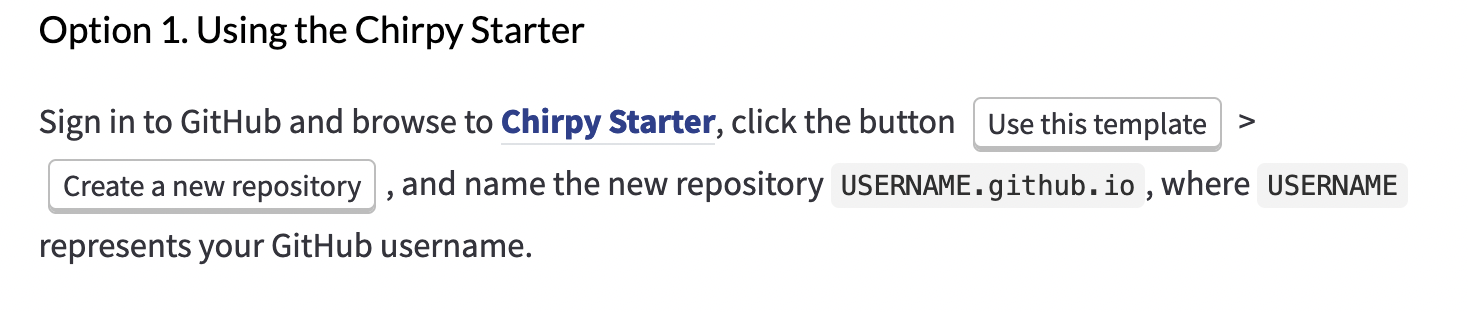
Use the Chirpy Starter template to create a new Public GitHub repository.
![Chirpy Starter]()
- Clone the repo to your local machine with your terminal of choice, making sure to replace
USERNAMEwith your GitHub username.1
git clone https://github.com/USERNAME/USERNAME.github.io - Navigate to the cloned directory and update the variables of
_config.ymlas needed. I recommend updating at the minimum:- lang
- timezone
- title
- tagline
- description
- url
- (Optional) Enter the project folder and test locally before pushing changes.
1
2
3
 cd username.github.io

 bundle exec jekyll s
I had trouble executing this command on my device and ran into issues installing
eventmachine (1.2.7). See below for a possible fix. When you’re ready, commit and push the changes to your repo (make sure you’ve entered the project folder in your terminal before running these commands)
1 2 3 4 5
git add --all git commit -m "Initial commit" git push -u origin main- That should do it! Deployment is automatic, so fire up a browser and go to
https://username.github.io.
Fixing eventmachine installation error
Issue: The Ruby installation that came bundled with macOS Monterey on my M1 Macbook Air caused issues. Specifically,
An error occurred while installing eventmachine (1.2.7), and Bundler cannot continue. Make sure that
gem install eventmachine -v '1.2.7' --source 'https://rubygems.org/'succeeds before bundling.`
I tried many solutions: re-installing openssl via brew, attempting to force link openssl with the command brew link --force openssl (DO NOT DO THIS, IT WILL BREAK THINGS), installing another Ruby environment per the Jekyll documentation, and several other fixes found on Stack Exchange. In the end, the only thing that worked was forcing the brew installed Ruby to be earlier in my system path.